Testing And Maintenance
Use this guide for steps on viewing maintenance records and creating new records.
Quick Find:
Printable Sheets for Recording Logs
Explanation of the Fields in the Records
The Testing and Maintenance window can be used for logging Recloser trip testing verification, storing changes to the device such as coil pack, Oil levels, and gasket and other properties of the Devices.
Navigating the Testing and Maintenance Window
Default Layout of the Testing and Maintenance Window:
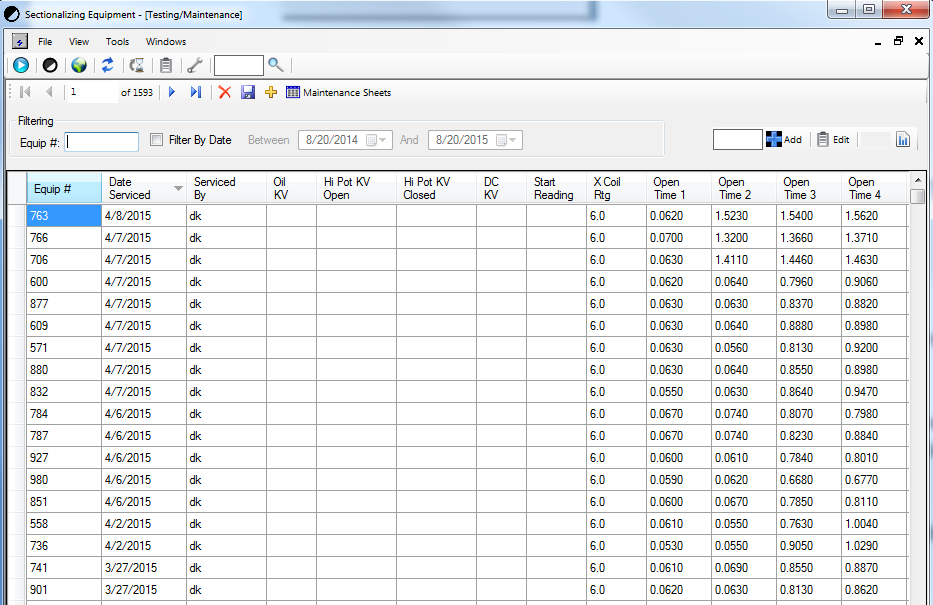
- Viewing Logs in the Spreadsheet - Use this for finding records in the spreadsheet layout (individual device records can be found in a printable format below)
- All of the records in the database are displayed by default. Using the Filter Tools you can sort these by date or by equipment number
- You can sort these records by any field in the database by double clicking the column header.
- All of the records in the database are displayed by default. Using the Filter Tools you can sort these by date or by equipment number
- Fields - Use this for an explanation of the fields in the spreadsheet
- Equip# - Unique Co-op identifier assigned to each device.
- Date Serviced - The date that the record was collected on
- Serviced By - The initials (typically) of the person who performed the testing/maintenance.
- Oil KV - The rating of the insulating Oil of the device.
- Hi Pot KV Open - If conducting High Potential Open tests, this would be the voltage applied to the recloser when it is in an open state.
- Hi Pot KV Closed - If conducting High Potential Open tests, this would be the voltage applied to the recloser when it is in an closed state.
- DC KV - The DC voltage of the testing applied to the recloser.
- Start Reading - The operation reading of the equipment before starting testing (amount of trips on the device counter).
- X Coil Rtg - The amount of current the device was tested at as a multiple of the Continuous Current rating of the device.
- Ex. 50 amp continuous current rated recloser, testing was performed at 165 Amps--- 165 Amps / 50 Amps = 3.3 X Coil Rtg
- Open Time 1-4 – The amount of time current was applied at the X Coil Rtg value before the device operated.
- Open Amps 1-4 – The exact amperage that each test was conducted at (some equipment can monitor this so it is supplemental information to the X Coil Rtg).
- Min Pickup - The lowest Amperage that the device was found to operate at.
- End Reading - The amount of operations on the device counter once testing was completed.
- Oil Chg - Was the Oil changed during the testing/maintenance?
- Gasket Chk - Was the gasket checked during maintenance, checked is yes.
- Contact Chk - Were the Contacts checked during maintenance, checked is yes.
- Counter Chk - Was the Operation Counter checked during maintenance, checked is yes.
- Comments - Any relevant information, common notes are about what service was performed and any degradation noticed.
Viewing Records
Use this guide to access records on a specific device and view them in a printable format.
- Begin by identifying the Equipment Number of the device you want to retrieve records from.
In this example we will retrieve records for device 345 - Enter the Equipment Number into the text box located in the upper left here: See Filtering Records here
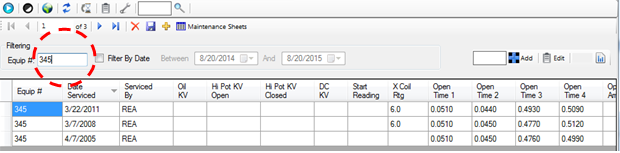
- Once the records have been filtered press the spreadsheet button to the far right of the text box.

- You should have a new window open with the reports on that device.

Creating Records
Use this guide for steps on how to log records on Testing and Maintenance.
Begin by opening the Testing and Maintenance Window.
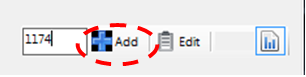
- Identify the Equipment Number of the Device that you wish to record the logs for.
- Enter that number into the text box in the upper right corner located here:
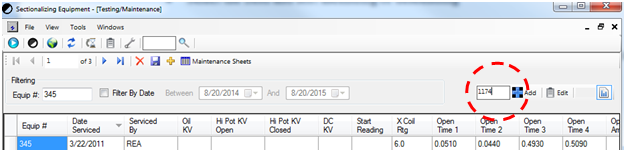
- Either press enter or the Add button
- A new screen should appear that looks like this:
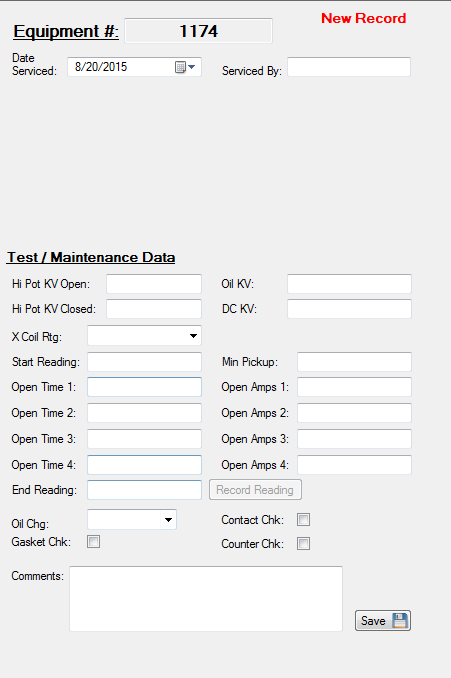
- Start filling out the data you have gathered during the Testing/Maintenance.
- See fields for explanations of data - Fields
- See fields for explanations of data - Fields
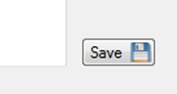
- Once you have completed filling out all known fields select the Save button in the lower right.
- The Record should be added to the database now.
Edit Note
You can edit records in a way similar to adding new, just press the edit button next to Add when you type in the equipment number in step 3.
Printable Records Log Sheet
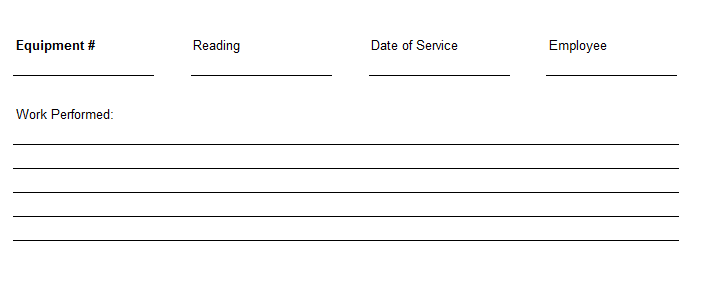
Use this guide for steps on how to print a blank sheet that can be used to record data in the field, and during on-site testing.
Begin by opening the Testing and Maintenance Window.
- Press the Maintenance Sheets button here:

- The form will look like this.
STAR Energy Services LLC