Navigating LYNX
This section covers how to navigate the LYNX program upon opening, managing windows within LYNX, and how to use the search features.
Quick Find:
Upon Opening LYNX
Tutorial Note
The LYNX program uses windows within the program to complete different functions. See the Windows page for list of each different window with links to their pages.
Start Screen Layout
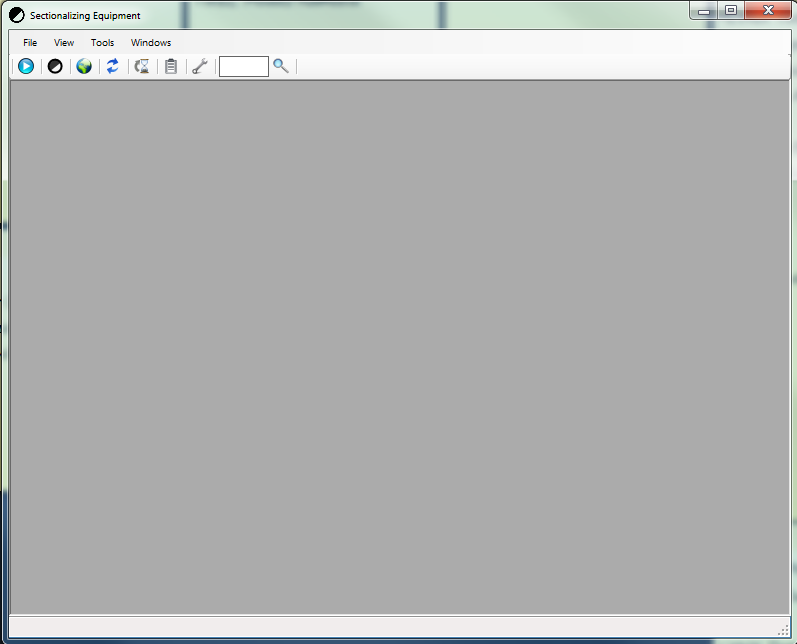
Tabs
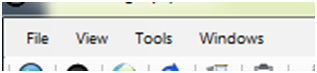
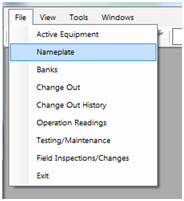
- File - Use to open windows to the different screens in LYNX
- View - Use to enable/display the buttons and bottom status bar
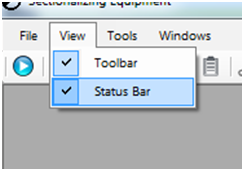
- The default is to have the toolbar and the status bar enabled.
- The default is to have the toolbar and the status bar enabled.
- Tools - Contains options for setting User Permissions and System Setup
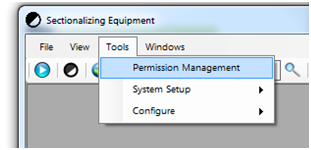
- Permission Management enables what settings different users can change (with the default admin login these settings will not need to be changed at all)
- System Setup is where you can change menu options for the different features of LYNX. If you need to add an option to a drop down menu for equipment this is where you will go. See Entering New Devices section for more information.
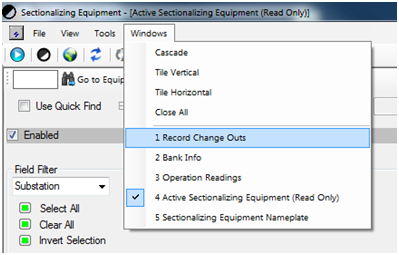
- Windows - Controls viewing options for displaying multiple LYNX windows.

- Once you have one or more windows open you can manage them from this location also.
- Once you have one or more windows open you can manage them from this location also.
- File - Use to open windows to the different screens in LYNX
Buttons
Active Equipment

From this window you can view active equipment (installed and in the field).
Nameplate

In this window you can access individual equipment by Co-op/Equipment #, enter new equipment, change existing equipment specifications, change the status of devices, and add comments to individual devices.
Banks

This window allows you to view, add, and delete banks.
Banks Note
This screen is for Banks characteristics, NOT equipment in banks
Change Out

Use this window to move equipment in and out banks, as well as to make device status changes.
Change Out History

From this window you can view all Equipment moves into and out of Banks.
Operations Readings

In this window you can check, add, edit, or delete the number of operations (fault breaks) recorded from the devices.
Testing/Maintenance

- This window will allow you to view, add, and edit service records for devices.
- Search Bar
- Use this search bar to look up equipment by equipment/co-op number
- It will pull up a history of that device including its current specifications, current location (if installed), bank change out history, testing/maintenance logs, and operation readings.
- Use this search bar to look up equipment by equipment/co-op number
Managing Windows
- Opening Windows
To open windows to complete tasks in LYNX either use the dropdown menu under File OR select the button from the toolbar
Windows Note
You can have more than one window open at once (for example you could have the Nameplate and the Change Out windows open), if you are actively editing data it is recommended to only have one window open because the different windows pull data from the same location. If you make changes to one window it won’t be reflected on the other until you refresh or close and reopen it.
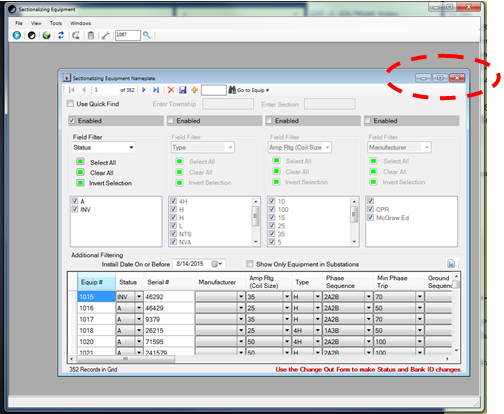
- Adjusting Windows
- The default when opening a new window is for it to be smaller then the available space inside LYNX program window. You can maximize, minimize, or close these sub windows in LYNX by using the upper right buttons.
- The default when opening a new window is for it to be smaller then the available space inside LYNX program window. You can maximize, minimize, or close these sub windows in LYNX by using the upper right buttons.
- Multiple Windows
- If you wish to have multiple windows open at once there are options for scaling them automatically located under the Windows tab
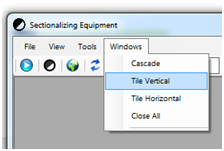
- If you wish to have multiple windows open at once there are options for scaling them automatically located under the Windows tab
Ex. Vertical tile of two windows
Remember to save before closing a window if entering new, editing, or deleting entries.
Using Search Tools
There is a variety of ways to search for a specific device, bank, or record within LYNX. There are also tools for filtering records.
Lookup a specific device history and settings:
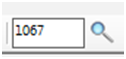
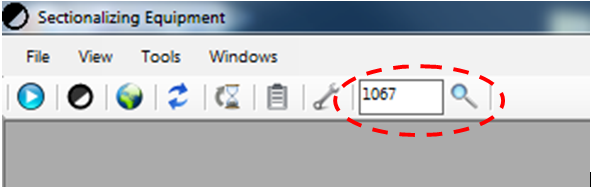
- Enter the Equipment/Co-op number into the search bar here
- Results are displayed in the LYNX program window
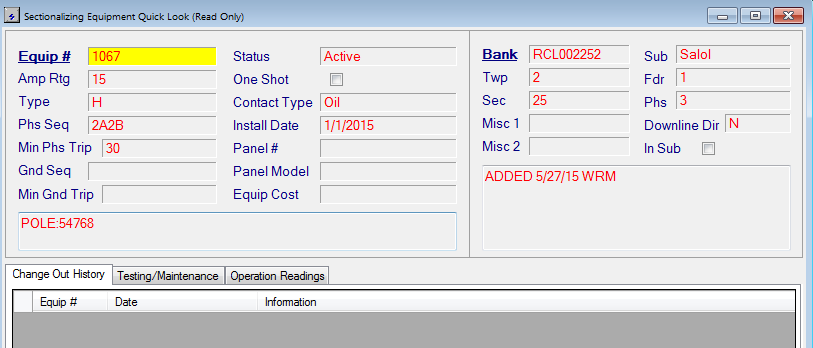
- Use the tabs to look at historical data on the device
Filter devices to find a specific device:
Inside the Active Equipment and Nameplate windows you can filter and search entries to find specific devices in three ways.
Equipment Search
Use one of these methods for searching if you wish to find a device and edited its information.
- Go To Equipment search - Use this search when you know the Equipment number.
- To use the Go To Equipment feature first enter the Equipment number into the search box next to the binoculars and "Go To Equip #" text.
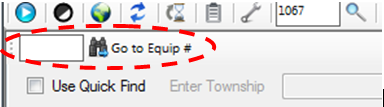
- Press enter or click the binoculars button.
- The window will jump to that entry in the database and highlight the row.
- To use the Go To Equipment feature first enter the Equipment number into the search box next to the binoculars and "Go To Equip #" text.
- Quick Find - Use this search to locate a device by location
- Start this search by selecting the Quick Find checkbox
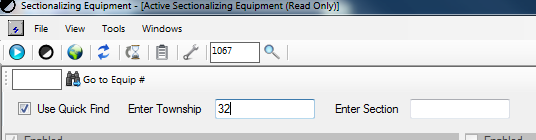
- Enter the Township, Section, or both to find the specific device.
- If there is more then one device in that location it will display all results.
- If you are unsure of one of the location numbers you can enter one and look through the results for the specific device.
- Start this search by selecting the Quick Find checkbox
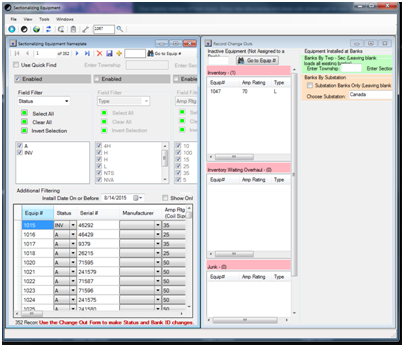
- Advance Filtering - Use this to filter devices by a variety of criteria
You can use the filter tools to select any criteria in the database and filter the results based on if you want to include or exclude based on the data in that field.- Start by making sure that the Quick Find is disabled (default is to have the Quick Find disabled and the Filter on). Default setting in first (leftmost) box is by Substation.
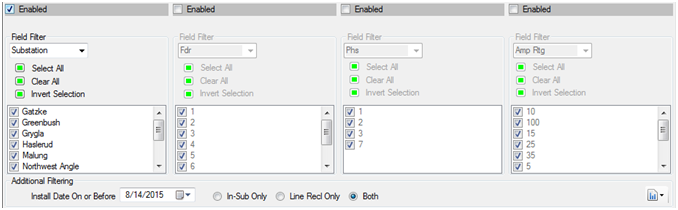
- With the first box enabled select from the dropdown the desired filter criteria.
- Select the devices to include in the filter by checking and un-checking the appropriate boxes.
- You can use the Macro selection boxes to select all, deselect all, or swap checked and un-checked boxes (Invert Selection button)
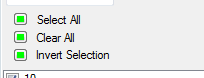
- You can use the Macro selection boxes to select all, deselect all, or swap checked and un-checked boxes (Invert Selection button)
- Enable up to 4 boxes with different filter criteria to add additional search refinement.
- Start by making sure that the Quick Find is disabled (default is to have the Quick Find disabled and the Filter on). Default setting in first (leftmost) box is by Substation.
- Additional Filtering - Use to limit displayed devices by install date and/or installed location, this is an additional filter to the above listed ones.
- Begin by specifying the install date in this location below the advance filtering. This filter displays only devices installed on or before that date.
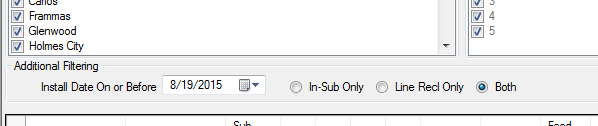
- The default for this filter is to display all results, so the date is set to show before todays and the location filter is set to both.
- Next select if you wish to limit the results to "In-Sub Only" (feeder level devices) or "Line Recl Only" (downline devices).

- This will be an additional filter to any filters already in place.
- Begin by specifying the install date in this location below the advance filtering. This filter displays only devices installed on or before that date.
Other Search tools:
- Change Out window search tools
- Inactive Equipment search - Use this search tool to find by equipment number an inactive device on the Change Out screen (to add it to a bank or change its device status).
- Enter the Equipment number into the search tool located here and either press enter or select the binoculars button.
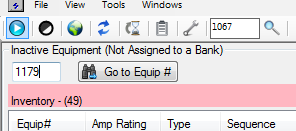
- It will highlight and display the equipment if it is in the database as under any of the three inactive statuses. Otherwise an error box will appear.
- Enter the Equipment number into the search tool located here and either press enter or select the binoculars button.
- Equipment Installed at Banks - Use this search to find equipment sorted into individual banks by Township, Section, or both.
- Begin by entering the location data for the selected area. You can enter one field, or both.

- Select Load Banks, results for banks that meet that criteria will be displayed below.
- Begin by entering the location data for the selected area. You can enter one field, or both.
- Substation Search
- Select the substation desired

- Check the box for Substation Banks Only if feeder level devices only are desired.
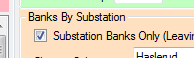
- Select Load Banks, results will be displayed below.
- Select the substation desired
- Inactive Equipment search - Use this search tool to find by equipment number an inactive device on the Change Out screen (to add it to a bank or change its device status).
- Change Out History Search Tools
- Equipment Number Search - Use to look up change out records on a specific device.
- Enter the Equipment number in to the box located here
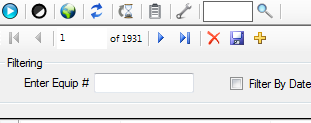
- Records will filter to results that match that criteria. Remember that there can be multiple records for one device.
- Enter the Equipment number in to the box located here
- Filter By Date - Use to look at change out records from a certain date range
- To begin check the Filter By Date box

- Use calendar dropdowns to adjust the date range
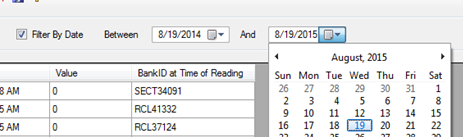
- Records will filter to results that match that criteria.
- To begin check the Filter By Date box
- Equipment Number Search - Use to look up change out records on a specific device.
STAR Energy Services LLC